In this tutorial I'm explaining how I make all the printable sheets that I post on here, so you can do it too. I don't know how many easy steps it's going to be, but it's going to be easy.
What you need:
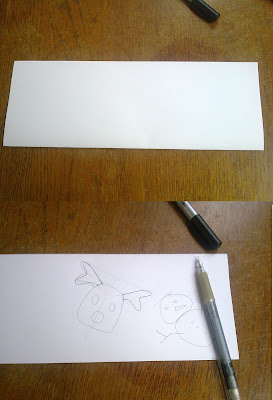
STEP 1: After you've gathered your supplies, fold the sheet of paper in half lengthwise. Imagine it to be a supersized folding strip, and get an idea of where you want your designs to go. Then you're ready to start doodling with your pencil. As you can see this is sketch is of one of the christmas designs from my previous post.
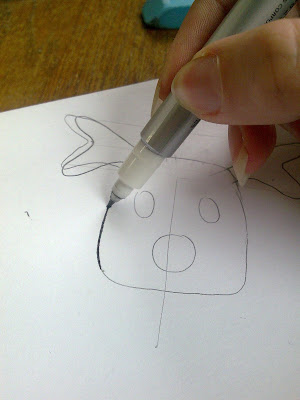
STEP 2: Doodle and sketch until you are happy with the design. When you are, trace the final lines with you marker/pen. Make sure it's as smooth as possible.
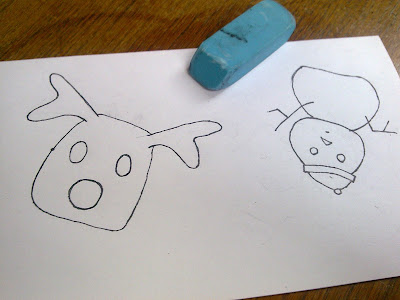
STEP 3: Erase the sketch. You won't need the pencil lines anymore, so erase them. Your design will now look all cleaned up.
STEP 4: Make it digital. The following is not so easy to show in images, so follow these steps very carefully.
- Scan and save your design.
- Open the image in Paint.
- Click File -> Save As, and select 'Monochrome Bitmap' as the format. Click Save. Click OK if it tells you that doing this will screw up the colors, screwing up the colors is exactly what we want.
- Select all (Ctrl+A).
- Copy (Ctrl+C).
- Open a new blank paint file.
- Paste (Ctrl+V). You need to do all this copying and pasting because the monochrome file will no longer accept color, and we do want to put color back into the design later.
- Save. This is the new file that we'll be working from.
Now it's time to clean up the image. Select the pencil and zoom in. Remove any stray pixels and smooth out the lines a little. Pay special attention to whether the bits of your design that you are going to color in are properly closed off. You wouldn't want to flood fill the entire image.

STEP 5: DONE. Or at least, if you wanted a black and white only design, your image is now finished and you can skip to step 7. If you want color, keep reading.
Note: you may want to do some cropping or rearranging of the design so that it will look nice one under the other. You'll understand when you look at step 7.

STEP 6: Color! You can now use Paint or other software to give the image all the color you want. Here I used paint to flood fill the items, and later I used Gimp (photoshop for cheapskates) to add a shaded background

STEP 7: Now we're going to get all of this onto a printable sheet. I usually do this in Word but I bet there are other programs that do this. Make a table of 20 columns and 1 row. Make sure they cover most of the page and use the right-click option that distributes the columns evenly to get them all the same size. You can leave them like this or make the lines grey and dotted so that they will not show up on the stars as much.
Paste the finished image into the first column. Right-click it and change its width to around 1 cm. To be accurate about this, check out the column width in the table settings, and use this measurement for the width of the image. Copy the shrunken image, hit Enter, and paste it. Fill up about half of the column with your image. Then copy the 'stack' of design, and paste it into the other columns.

STEP 8: Print! Your sheet is now ready to print. Well done :).
Optional: At this point I use CutePDF Writer to convert the whole thing into a .pdf file and upload it for your enjoyment.
If any of this is not working out for you, feel free to leave a comment or send me a message and I'll see if I can be of any help.
Good luck! :)


 Recycle


